Installation
Rhasspy should run in a variety of software environments, including:
- Within a Docker container
- As a Hass.io add-on
- Inside a Python virtual environment
- Running as a service
- Build from source
Docker
The easiest way to try Rhasspy is with Docker. To get started, make sure you have Docker installed:
curl -sSL https://get.docker.com | sh
and that your user is part of the docker group:
sudo usermod -a -G docker $USER
Be sure to reboot after adding yourself to the docker group!
Next, start the Rhasspy Docker image in the background:
docker run -d -p 12101:12101 \
      --restart unless-stopped \
      -v "$HOME/.config/rhasspy/profiles:/profiles" \
      --device /dev/snd:/dev/snd \
      synesthesiam/rhasspy-server:latest \
      --user-profiles /profiles \
      --profile en
This will start Rhasspy with the English profile (en) in the background (-d) on port 12101 (-p) and give Rhasspy access to your microphone (--device). Any changes you make to your profile will be saved to ~/.config/rhasspy.
Once it starts, Rhasspy's web interface should be accessible at http://localhost:12101. If something went wrong, trying running docker with -it instead of -d to see the output.
If you're using docker compose, add the following to your docker-compose.yml file:
rhasspy:
    image: "synesthesiam/rhasspy-server:latest"
    restart: unless-stopped
    volumes:
        - "$HOME/.config/rhasspy/profiles:/profiles"
    ports:
        - "12101:12101"
    devices:
        - "/dev/snd:/dev/snd"
    command: --user-profiles /profiles --profile en
Updating Docker Image
To update your Rhasspy Docker image, just run:
docker pull synesthesiam/rhasspy-server:latest
on your Rhasspy server and restart the Docker container. This may require running something like:
docker rm <container-name>
before doing a docker run...
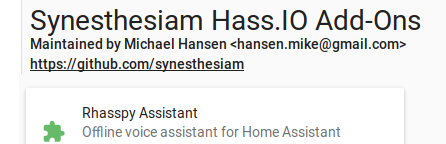
Hass.io
The second easiest way to install Rhasspy is as a Hass.io add-on. Follow the installation instructions for Hass.io before proceeding.
To install the add-on, add my Hass.IO Add-On Repository in the Add-On Store, refresh, then install the "Rhasspy Assistant" under “Synesthesiam Hass.IO Add-Ons” (all the way at the bottom of the Add-On Store screen).
NOTE: Beware that on a Raspberry Pi 3, the add-on can take 10-15 minutes to build and around 1-2 minutes to start.
Watch the system log for a message like Build 8e35c251/armhf-addon-rhasspy:2.11 done. If the “Open Web UI” link on the add-on page doesn’t work, please check the log for errors, wait a minute, and try again.
Before starting the add-on, make sure to give it access to your microphone and speakers:

Updating Hass.IO Add-On
You should receive notifications when a new version of Rhasspy is available for Hass.IO. Follow the instructions from Hass.IO on how to update the add-on.
Virtual Environment
Rhasspy can be installed into a Python virtual environment, though there are a number of requirements. This may be desirable, however, if you have trouble getting Rhasspy to access your microphone from within a Docker container. To start, clone the repo somewhere:
git clone https://github.com/synesthesiam/rhasspy.git
Then run the download-dependencies.sh and create-venv.sh scripts (assumes a Debian distribution):
cd rhasspy/
./download-dependencies.sh
./create-venv.sh
Once the installation finishes (5-10 minutes on a Raspberry Pi 3), you can use the run-venv.sh script to start Rhasspy:
./run-venv.sh --profile en
If all is well, the web interface will be available at http://localhost:12101
Updating Virtual Environment
To update your Rhasspy virtual environment to the latest version, run:
git pull origin master
in your rhasspy directory, and then update your Python dependencies:
source .venv/bin/activate
pip3 install -r requirements.txt
You should also re-build the web interface:
- Install yarn on your system
- Run
yarn install && yarn buildin therhasspydirectory - Restart any running instances of Rhasspy
Running as a Service
Once installed, Rhasspy can be run as a systemd service. An example unit file is available (thanks UnderpantsGnome):
[Unit]
Description=Rhasspy
After=syslog.target network.target

[Service]
Type=simple
WorkingDirectory=/home/<USER>/path/to/rhasspy
ExecStart=/bin/bash -lc './run-venv.sh --profile <LANGUAGE>'

RestartSec=1
Restart=on-failure

StandardOutput=syslog
StandardError=syslog

SyslogIdentifier=rhasspy

[Install]
WantedBy=multi-user.target
- Replace
/home/<USER>/path/to/rhasspywith the full path to your Rhasspy installation (whererun-venv.shis). - Replace
<LANGUAGE>with your profile language (e.g.,en)
Create a file named rhasspy.service in the /home/<USER>/.config/systemd/user directory (you may need to create the directory itself). Once the file has been saved, run:
systemctl --user daemon-reload
Then, you can start Rhasspy with:
systemctl --user start rhasspy
If you'd like Rhasspy to start on boot, run:
systemctl --user enable --now rhasspy
Build From Source
The create-venv.sh script uses pre-compiled binaries for Rhasspy's required tools:
The build-from-source.sh attempts to build all of these tools from source. The binary artifacts (command-line tools, shared libraries) are installed into the bin and lib directories of a Python virtual environment. The run-venv.sh script automatically adds these directories to PATH and LD_LIBRARY_PATH before starting Rhasspy.
Swap Size
On low memory devices like the Raspberry Pi, building the tools above can quickly consume the entire RAM. Before building, it's highly recommended that you increase the available swap space by several gigabytes:
- Edit
/etc/dphys-swapfile - Change
CONF_SWAPSIZEto something large, like 2048 (2GB) - Reboot
Kaldi
You can skip building Kaldi if you plan to just use Pocketsphinx for speech recognition.
Updating Source Install
Follow the same instructions as updating a virtual environment.