Usage
You can interact with Rhasspy in more ways than your voice:
Web Interface
A browser-based interface for Rhasspy is available on port 12101 by default (http://localhost:12101 if running locally). From this interface, you can test voice commands, add new voice commands, re-train, and edit your profile.
Top Bar
The top bar of the web interface lets you perform some global actions on Rhasspy, regardless of which page you have selected.
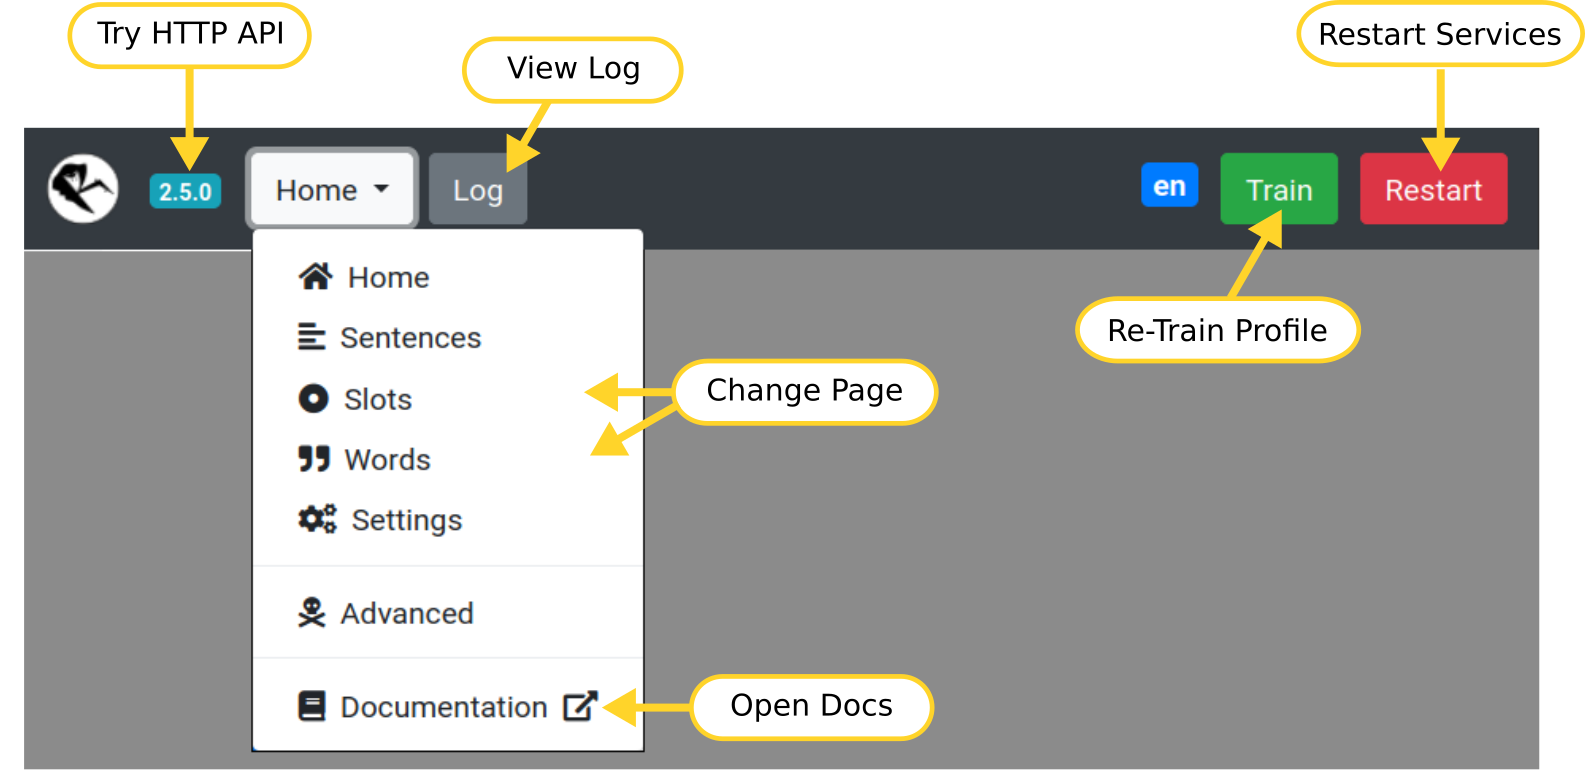
- Click the Rhasspy logo to reload the page
- Click the version number to test the HTTP API
- Use the dropdown menu to change pages or open the documentation
- The gray
Logbutton opens a dialog with log messages - The green
Trainbutton will re-train your profile - The red
Restartbutton forces Rhasspy to restart
Home Page
Test voice and text commands.
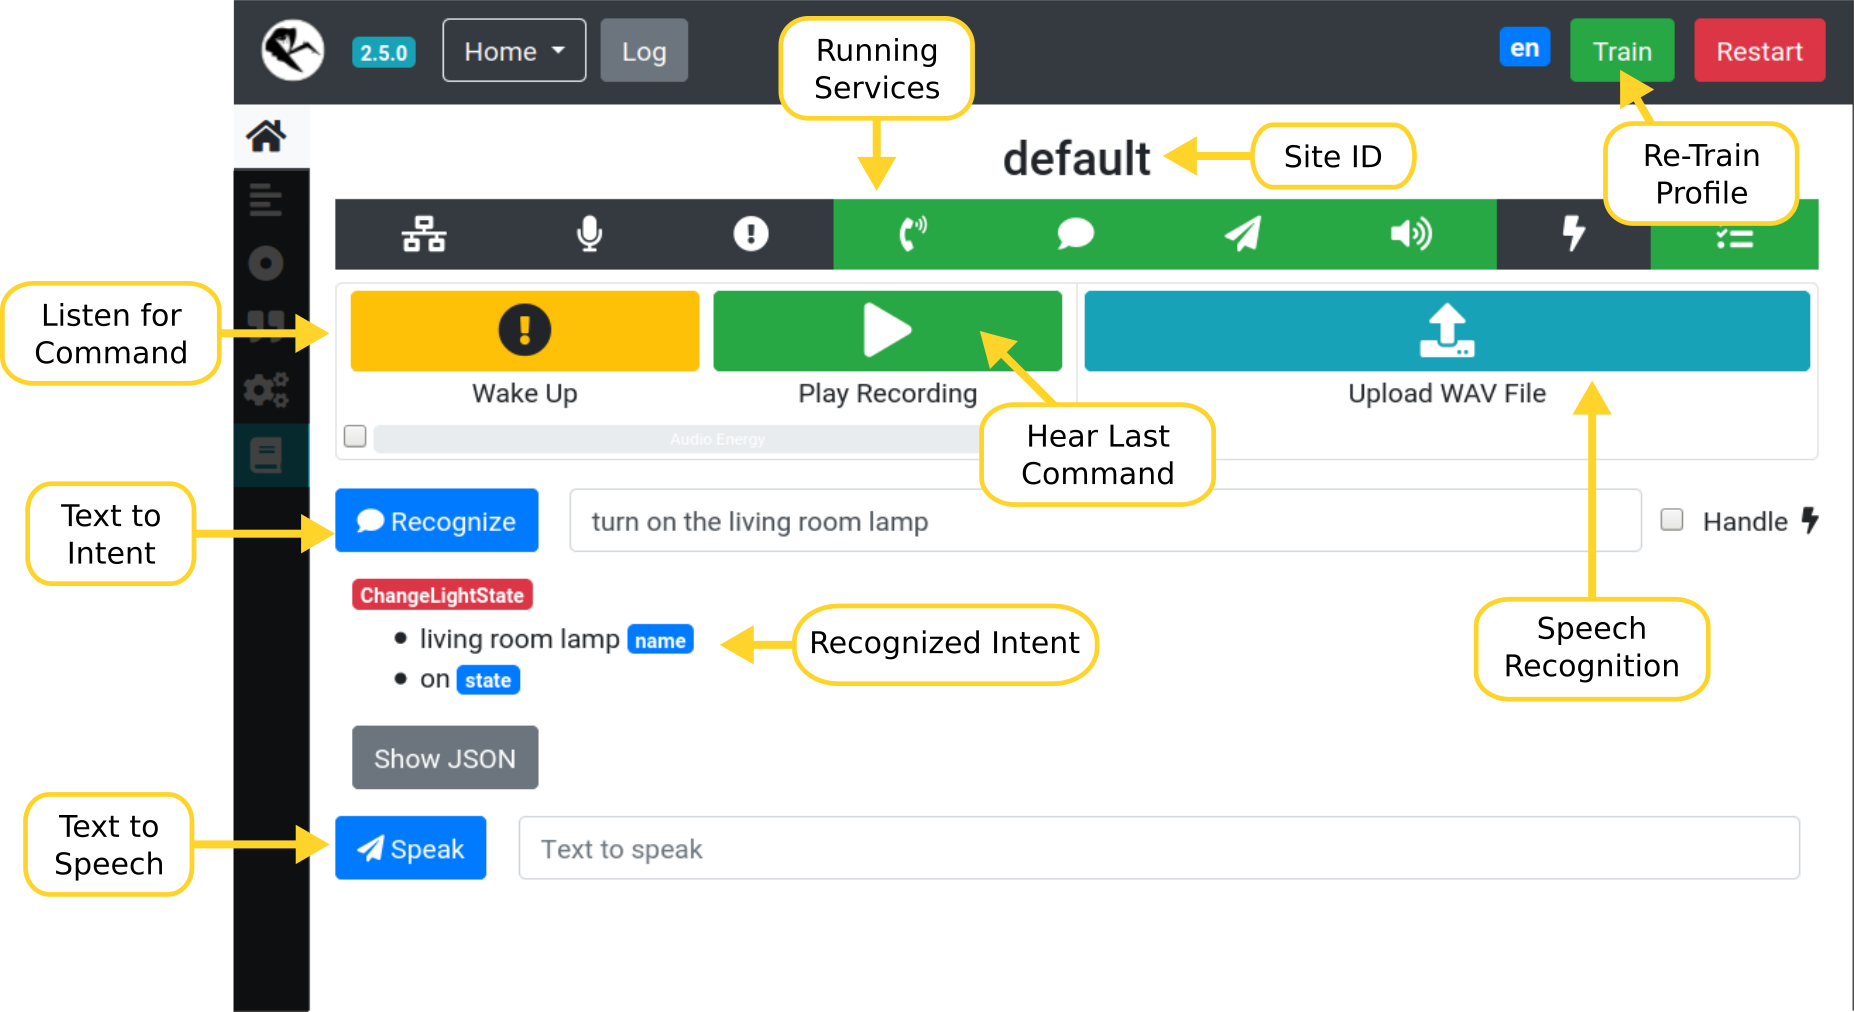
- Wake up Rhasspy and have it listen for a voice command
- Upload a WAV file with a voice command
- Enter a text command and Rhasspy recognize the intent
- Speak a sentence using the text to speech system
Sentences Page
Add new voice commands to Rhasspy using the template syntax.
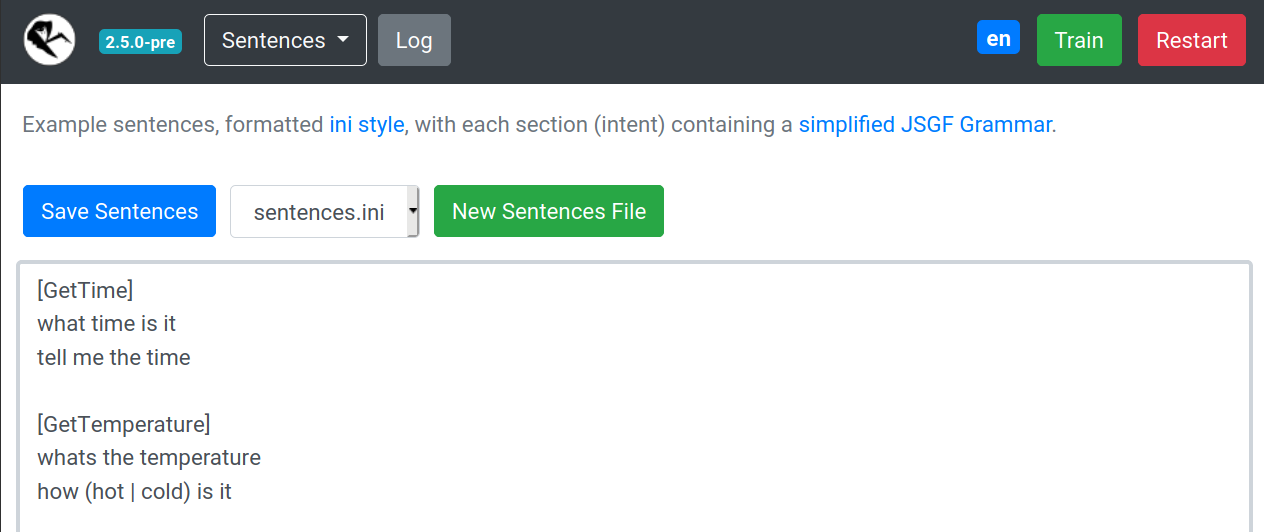
- Edits
sentences.iniby default - Create additional template files
- These should be prefixed by the
sentences_dirin your profile. For example,intents/more-commands.ini
- These should be prefixed by the
- The drop down can be used to switch editing between different template files
Slots Page
Edit your slots lists.
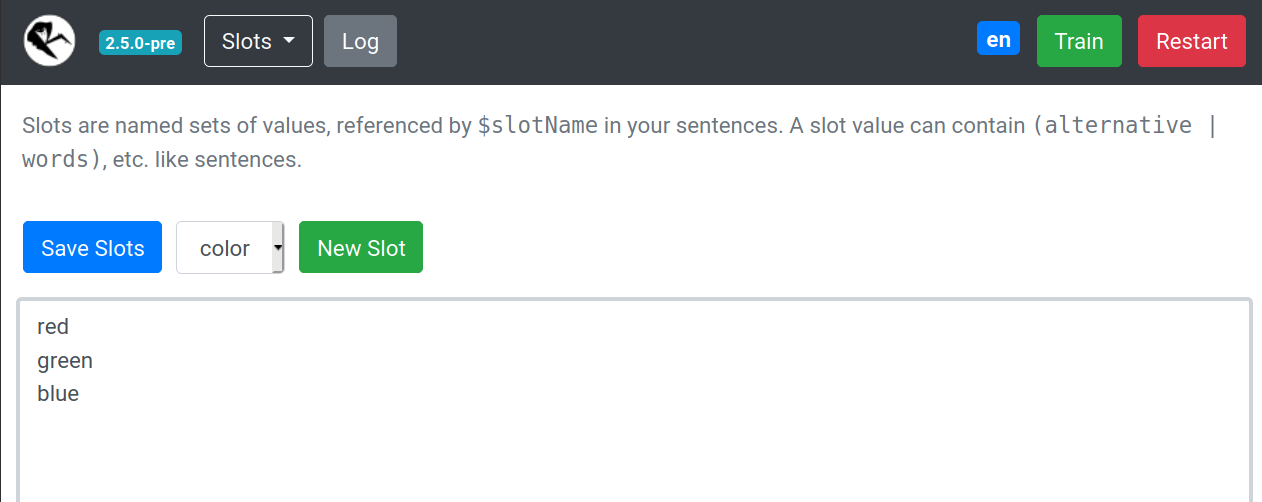
- Slot values will overwrite previous ones
- Create new slots (files in your
slotsdirectory) - Delete a slot by deleting all values and saving
Words Page
Teach Rhasspy how to pronounce new words.
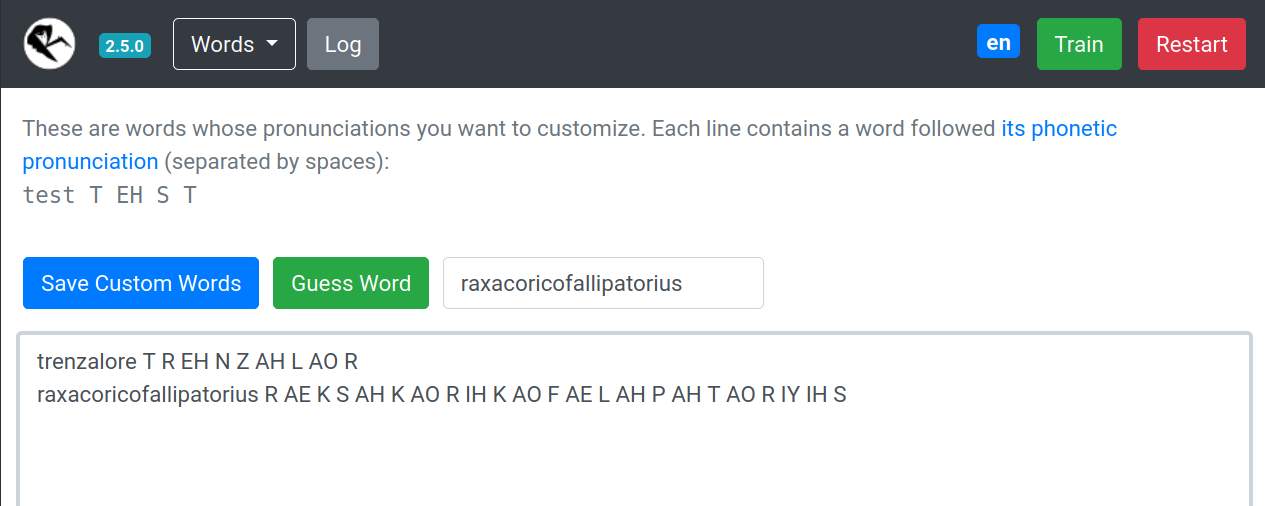
- Look up pronunciation(s) for known words (in your profile's
base_dictionary.txtfile) - Have Rhasspy guess how to pronounce a new (unknown) word
- Add new words to your
custom_words.txtfile
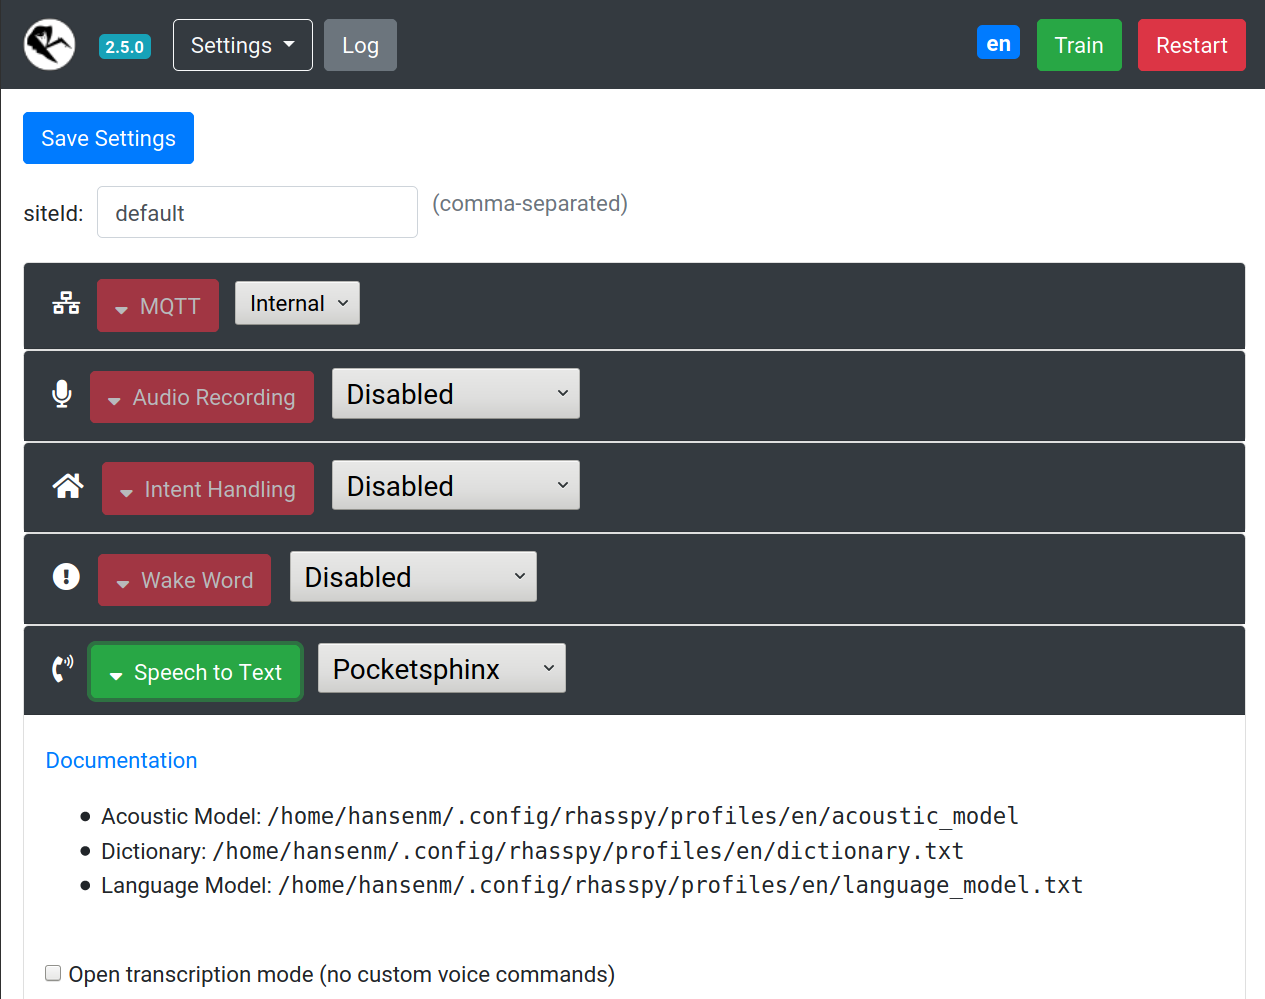
Settings Page
Simplified interface for editing your profile. Rhasspy will automatically restart after saving changes.
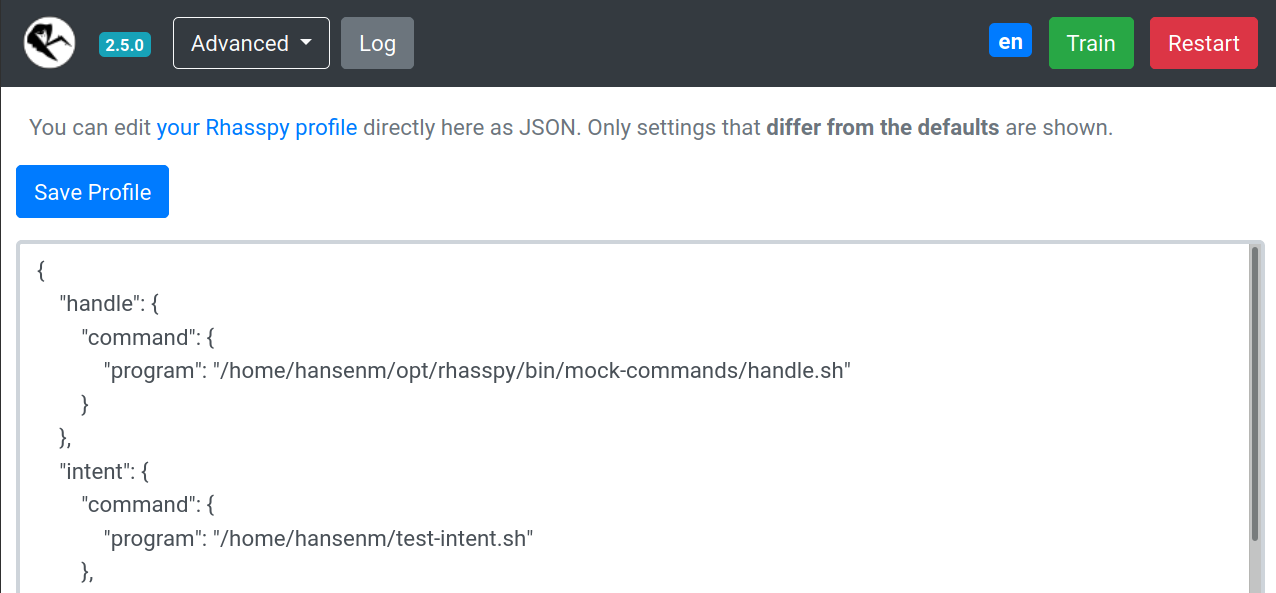
Advanced Page
Direct interface for editing your profile. Be careful! Entering invalid settings here can cause Rhasspy to not start.
Home Assistant
Rhasspy communicates with Home Assistant directly over its REST API.
Specifically, Rhasspy intents are POST-ed to the /api/intents/handle endpoint.
You must add intent: to your Home Assistant configuration.yaml to enable the endpoint.
To get started, check out the built-in intents. You can trigger them by simply naming your Rhasspy intents the same:
[HassTurnOn]
turn on the (bedroom light){name}

[HassTurnOff]
turn off the (bedroom light){name}
If you have an entity named "bedroom light" in Home Assistant, you can now turn it on and off from Rhasspy!
Adding a custom intent to Home Assistant is done with the intent script component. For example, a GetTemperature intent in Rhasspy might be defined as:
[GetTemperature]
whats the temperature
In Home Assistant's configuration.yaml file, add:
intent_script:
  GetTemperature:  # Intent type
    speech:
      text: We have {{ states.sensor.temperature }} degrees
    action:
      service: notify.notify
      data_template:
        message: Hello from an intent!
Assuming you have a sensor configured in Home Assistant, you should now be able to ask "what's the temperature" and have Rhasspy speak the response.
Automatically Downloading Entities
See the Home Assistant example for a full set of example sentences, slots, and slot programs that will automatically download entity names from your Home Assistant server.
Events Instead of Intents
Rhasspy can also communicate with Home Assistant using the events endpoint. If you choose this communication method, you must write your own automation scripts to handle these events.
If you have a Rhasspy intent named ChangeLightColor with name and color slots like in the RGB light example, then Home Assistant will receive an event of type rhasspy_ChangeLightColor whose event data is:
{
  "name": "bedroom",
  "color": "red"
}
when you say "set the bedroom to red". You should write a custom automation with an event trigger to do something when this event arrives. Catching the example event would look like:
automation:
  trigger:
    platform: event
    event_type: rhasspy_ChangeLightColor
    event_data:
      color: red
  action:
    ...
Getting the Spoken Text
The Home Assistant event will contain some extra "meta" slots besides the ones you specify:
_text- spoken voice command text with substitutions_raw_text- literal transcription of voice command_site_id- Hermes site ID for the recognized intent_intent- Hermes intent object
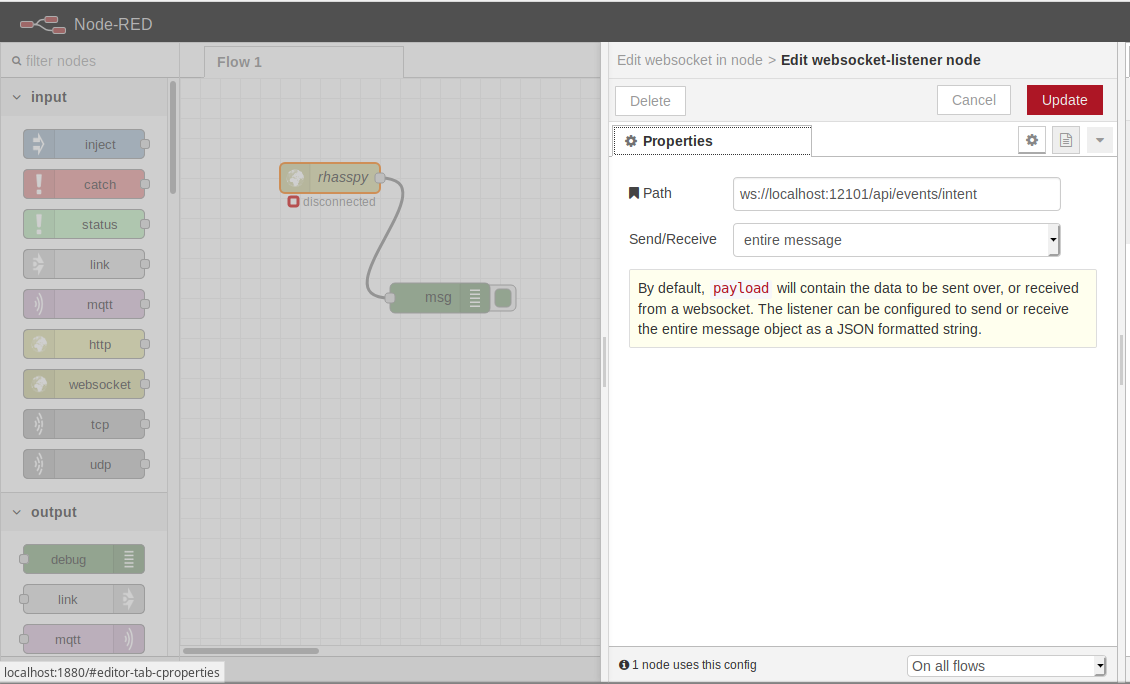
Node-RED
Rhasspy can interact directly with Node-RED directly through websockets.
Simply add a websocket input and set the path to ws://<rhasspy>:12101/api/events/intent where <rhasspy> is the hostname or IP address of your Rhasspy server.
Make sure to also set send/receive to "entire message".
More example flows are available on Github.
WebSocket Events
Rhasspy supports multiple websocket event endpoints:
/api/events/intent- Intent recognized or not
/api/events/wake- Wake word detected
/api/events/text- Speech transcription
/api/mqtt- Send/receive raw MQTT messages
WebSocket Intents
Whenever a voice command is recognized, Rhasspy emits JSON events over a websocket connection available at ws://YOUR_SERVER:12101/api/events/intent (replace ws:// with wss:// if you're using secure hosting).
You can listen to these events in a Node-RED flow, and easily add offline, private voice commands to your home automation set up!
For the ChangLightState intent from the RGB Light Example, Rhasspy will emit a JSON event like this over the websocket:
{
  "text": "set the bedroom light to red",
  "intent": {
    "name": "ChangeLightColor",
    "confidence": 1
  },
  "entities": [
    {
      "entity": "name",
      "value": "bedroom"
    },
    {
      "entity": "color",
      "value": "red"
    }
  ],
  "slots": {
    "name": "bedroom",
    "color": "red"
  }
}
WebSocket Wake
When the wake word is detected, or Rhasspy is woken up via the /api/listen-for-command HTTP endpoint, a JSON event is emitted at ws://YOUR_SERVER:12101/api/events/wake (wss:// if using HTTPS) like:
{
    "wakewordId": "default",
    "siteId": "default"
}
The wakewordId is set using the model or file name of your wakeword model (e.g., porcupine for porcupine.ppn). The siteId comes from your mqtt.siteId profile setting.
WebSocket Transcriptions
Each time a voice command is transcribed, Rhasspy emits a JSON event at ws://YOUR_SERVER:12101/api/events/text (wss:// if using HTTPS) like:
{
    "text": "text from voice command",
    "wakewordId": "default",
    "siteId": "default"
}
The transcription is contained in the text property. wakewordId is the id of the wakeword that initiated the voice command (or default). The siteId comes from your mqtt.siteId profile setting.
Websocket MQTT Messages
You can send and receive MQTT messages over a special websocket endpoint at ws://YOUR_SERVER:12101/api/mqtt (wss:// if using HTTPS).
Subscribing to Topics
Send a JSON message with the following form:
{
  "type": "subscribe",
  "topic": "the/mqtt/topic"
}
Receiving Messages
When a message whose topic you have subscribed to is received, you will get a JSON message like:
{
  "topic": "/the/mqtt/topic",
  "payload": ...
}
You should only subscribe to messages whose payloads can be serialized in JSON.
Publishing Messages
To send a message to all of Rhasspy's services, send a JSON message like:
{
  "type": "publish",
  "topic": "/the/mqtt/topic",
  "payload": ...
}
Single Topic
If you only need to receive messages from a single MQTT topic, you can connect to ws://YOUR_SERVER:12101/api/mqtt/<TOPIC> (wss:// if using HTTPS).
When a message is received on this topic, you will receive a JSON message like:
{
  "topic": "/the/mqtt/topic",
  "payload": ...
}
MQTT and Snips
Rhasspy is able to interoperate with Snips.AI services using the Hermes protocol over MQTT. See the description of Rhasspy's services for details.
HTTP API
Rhasspy features a comprehensive HTTP API available at /openapi/, documented with OpenAPI 3 (Swagger). See the HTTP API reference for more details.
Secure Hosting with HTTPS
If you need to access Rhasspy's web interface/API through HTTPS (formally SSL), you can provide a certificate and key file via command-line parameters or the Hass.io configuration.
If you're running Rhasspy via Docker or in a virtual environment, add --certfile <CERT_FILE> and --keyfile <KEY_FILE> to the command-line arguments where <CERT_FILE> is your SSL certificate (PEM) and <KEY_FILE> is your SSL private key file.
You can generate a self-signed certificate with the following command:
openssl req -x509 -newkey rsa:4096 -nodes -out cert.pem -keyout key.pem -days 365
After answering the series of questions, you should have cert.pem and key.pem in your current directory. Then run Rhasspy with:
<RHASSPY COMMAND> --certfile cert.pem --keyfile key.pem
The web interface will now be available at https://localhost:12101 and the web socket events at wss://localhost:12101/api/events/intent
In Hass.io, you will need to set the following options via the web interface or in your JSON configuration:
ssl:truecertfile:cert.pemkeyfile:key.pem
Command Line
A command-line client for the Rhasspy HTTP API is available in the rhasspy-client library.
You can install it with:
pip install rhasspy-client
and then run it:
rhasspy-client --help